Configure Solution
Once the solution is deployed, the portal will have all the solutions deployed with folder name 'Property Tax Solutions'.
Note: Ensure that the solution has been deployed and the folder is present in your portal. Refer to the link for help with deployment.
To update the solution with your own data, please follow the steps given below:
Overwrite the Services
To overwrite the services in the portal, the following steps needs to be followed:
- Open the PropertyTaxSolutions ArcGIS Pro project
 (.aprx) and select the AdminBoundaries Map tab in the ArcGIS Pro Software.
 - Optionally, make changes to its layers.
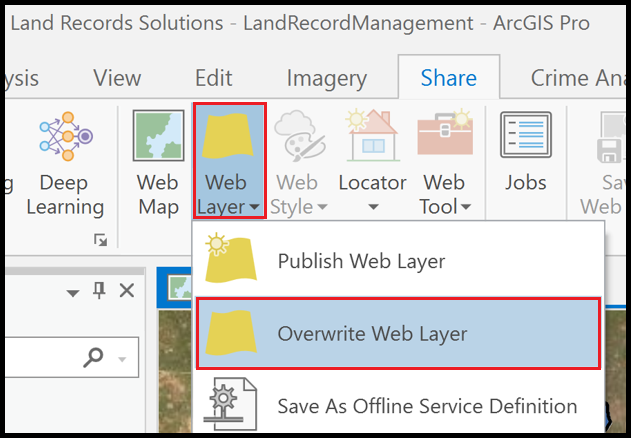
- On the Share tab, in the Share As group, click the Web Layer drop-down arrow and click Overwrite Web Layer.
- On the Overwrite Web Layer dialog box, browse to the AdminBoundaries Feature Layer within the Property Tax Solutions folder in the user portal and select it. Click OK.
- Read the Overwrite Web Layer message and click OK to continue.
- Under the layer name, accept the default option to Use the item description from the web layer or choose the option to Use the item description from the map or layer.
- Optionally modify the information in the Summary and Tags fields. If the fields are empty, you must fill them in.
- Optionally, under Share with, change the settings:
- Everyone : This option makes your content public. Anyone can access and see it.
- My Organization : If you are signed in with an organizational account, you see this option. This option allows your content to be shared with all authenticated users in the organization.
- Groups : You can share your content with groups to which you belong and their members.
- Leave all options unchecked to set the sharing level to the owner of the item.
- Optionally, click the Configuration tab and change settings.
- Under Finish Sharing, click Analyze to check for problems.

- When the layer is successfully published, click the Manage the web layer link at the bottom of the pane to access the web layer in your portal.
- If necessary, sign in to your portal to open the item page for the web layer. Open the layer in Map Viewer or use the Data and Visualization tabs on the item page to confirm that the web layer has been overwritten.
- Similarly, overwrite the BuildingFootprint Feature Layer from the BuildingFootprint Map tab in the ArcGIS Pro project.
Republish Survey Form
Steps to republish survey form using ArcGIS Survey123 Connect application
- Open ArcGIS Survey123 Connect.
- Login to the Portal.
- Download the Field Survey Survey Form.
- Open the Survey Form Field Survey.
- Click on XLS from the left pane, this opens the excel file.
- In the Survey Sheet, change the URLs of city, ward and circle given in the default column (this is for auto populating the Property details).
- Save the excel file.
- Click Linked Content from the bottom pane and select + Link Content button and choose Online map. Select Property Tax Webmap Web Map and click Ok.
- Click Map from the bottom pane and choose Property Tax Webmap Web Map from the Basemap selector.
- Click on Publish from the left pane.
- The survey form will be republished
Note: The ArcGIS Survey123 Connect desktop application can be downloaded here.
Configure Site Application
- Open Property Tax Solutions site application from the user portal and click on Configure App
- Add/Remove Layout items as desired. User also can change the theme and configure various elements as per convenience.
- Once all the changes have been made, click Save.
- Click on Publish Draft to publish and view the changes.
Next - Use Property Tax Management